.png)
Finally we are at a stage where the data we have processed and blended is ready to be output to a file. Alteryx gives us many options for exporting data to both files and databases including popular options such as csv, Excel, Tableau TDE and SQL servers. In addition, this list is increasing all the time increasing the utility Alteryx can bring to our data pipelines.
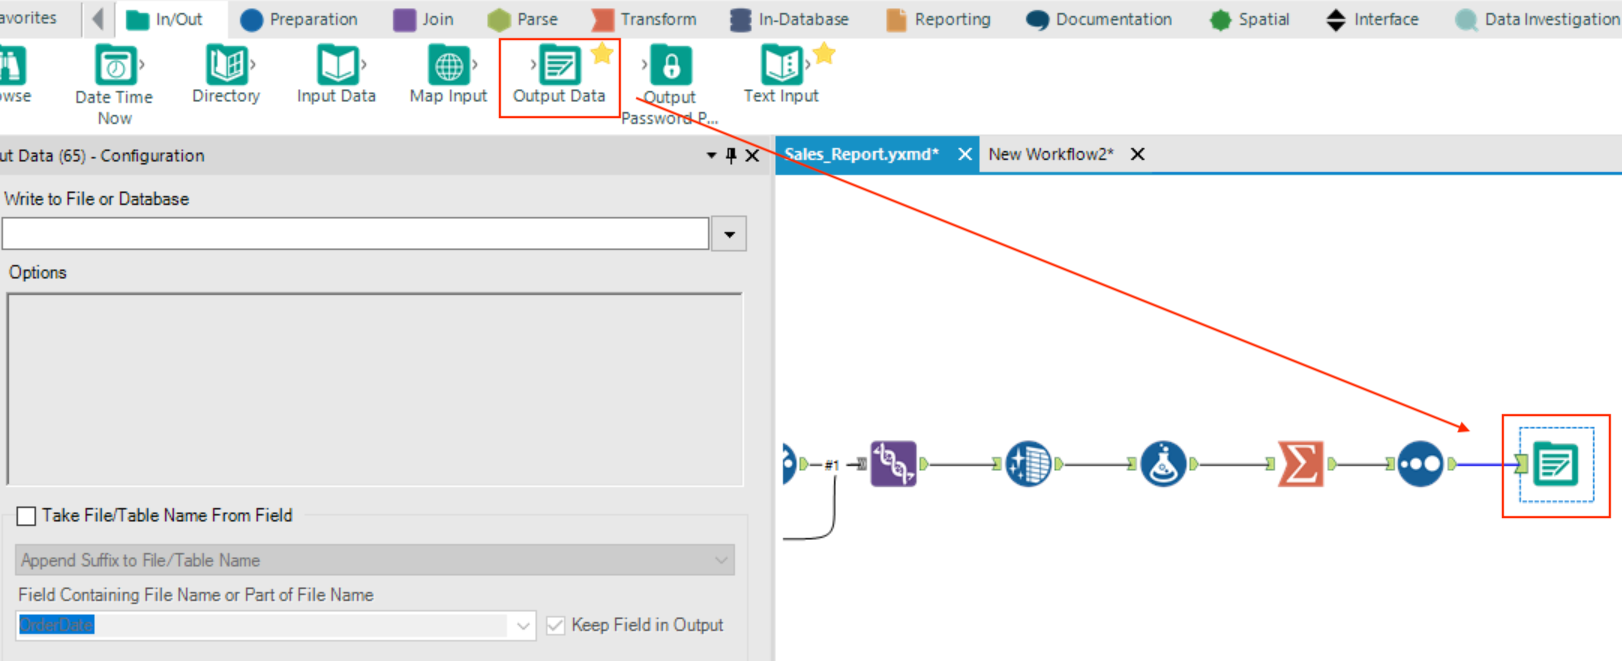
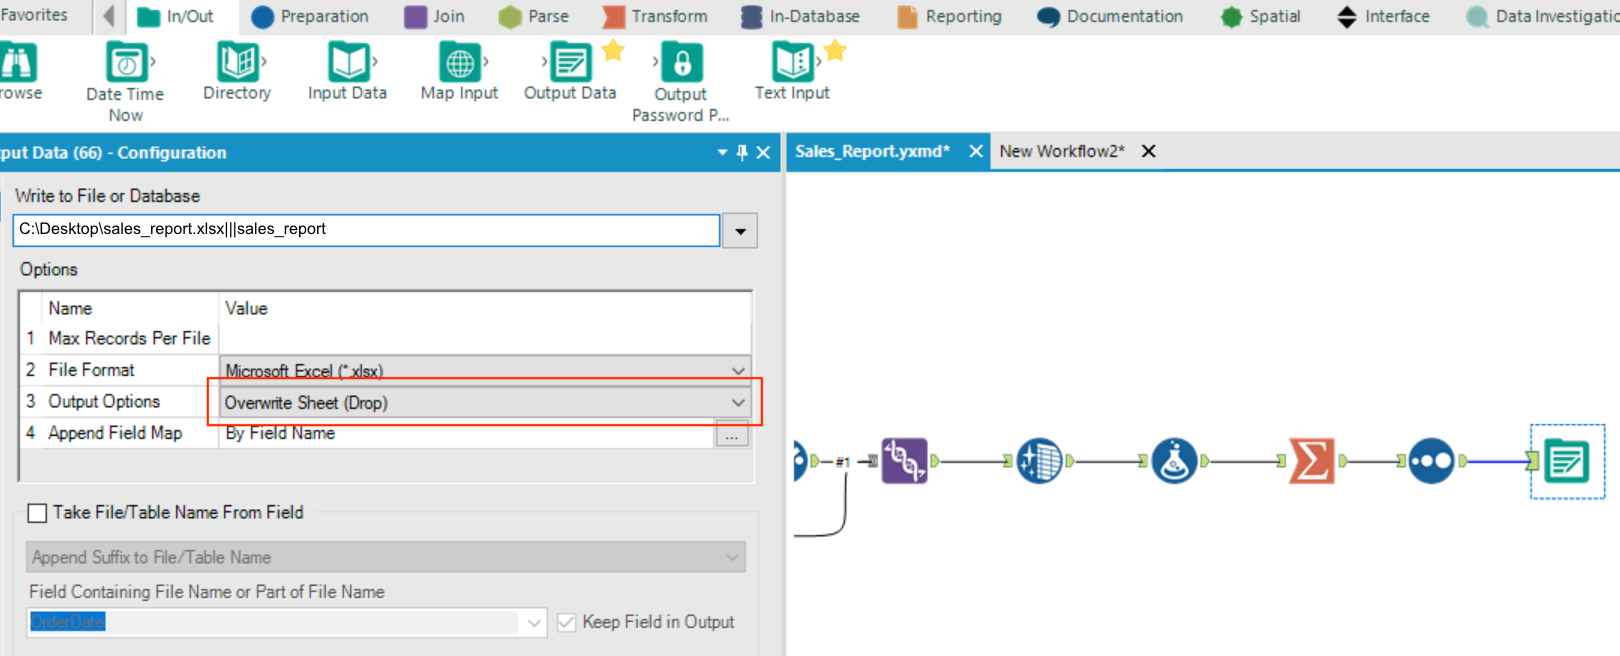
To output data in Alteryx we use the Output Data Tool located in the In/Out tab of the tool pallet.

For our workflow we are simply going to output the data to an Excel file. Let’s get started.
Step 1:
Let’s begin by dragging the Output Data Tool into the workspace and connecting the input to the output of the Sort Tool.
Step 2:
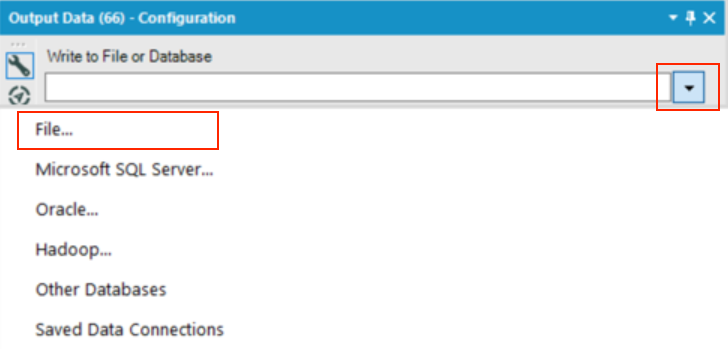
In the configuration window click the drop down in the “Write to File or Database” option and select “File…”.
Step 3:
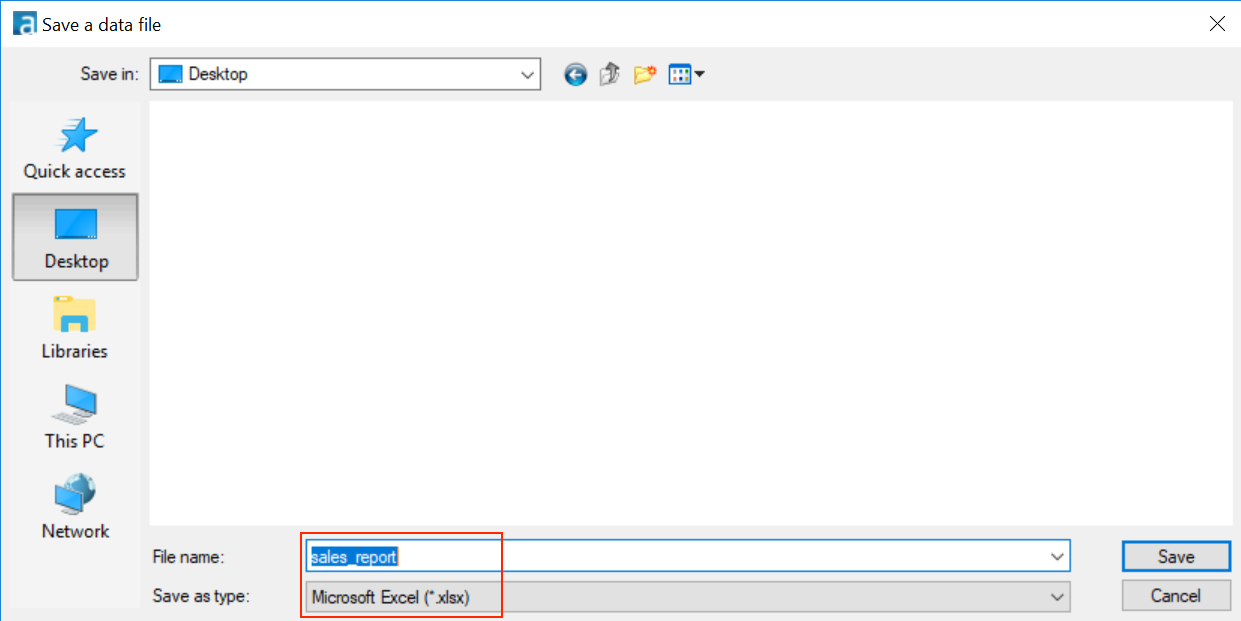
Now navigate to where you would like to save the file (in our case we are going to save to the Desktop). Name the file “sales_report”, select “Microsoft Excel (*.xlsx)” from the Save as type dropdown and click Save.
Step 4:
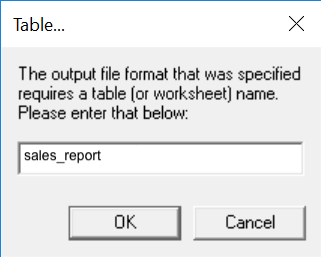
You should now be presented with pop-up asking you declare a name for the table or worksheet. This is just the name that the worksheet or tab that will be given in our Excel file that will be generated. Let’s simply name this sales_report and click OK.
Step 4:
The final step is to find the Output Options dropdown in the Data Output Tool configuration window and change this to “Overwrite Sheet (Drop)”. Selecting this option allows us to run the workflow as many times as required and the latest output will overwrite anything that is already in the Excel file.
Finally let’s run the workflow. Once this has completed you should be able to see the Excel file that has been created in the location specified in the previous steps with the data from our workflow
It’s worth noting that we can add as many Output tools to our workflow as required and we can connect them to any tool in the workflow. For example we may wish to have one output tool writing to an Excel file and another writing to a Tableau TDE file to feed a dashboard.
That’s it; you’ve made it through our Learn Alteryx for Beginners tutorial. We hope you are now confident in using Alteryx to build your own workflows for processing and blending data. We’re happy to receive feedback on every our content or requests for new tutorials and you can follow us on twitter for any future updates.