.png)
When Alteryx imports data through an input tool it chooses a data type for each field imported based on its best guess of the type in the data source. You will find (especially when importing from text, csv and excel files where there is no metadata), that Alteryx defaults to seeing these as a string (text) field.
Step 1:
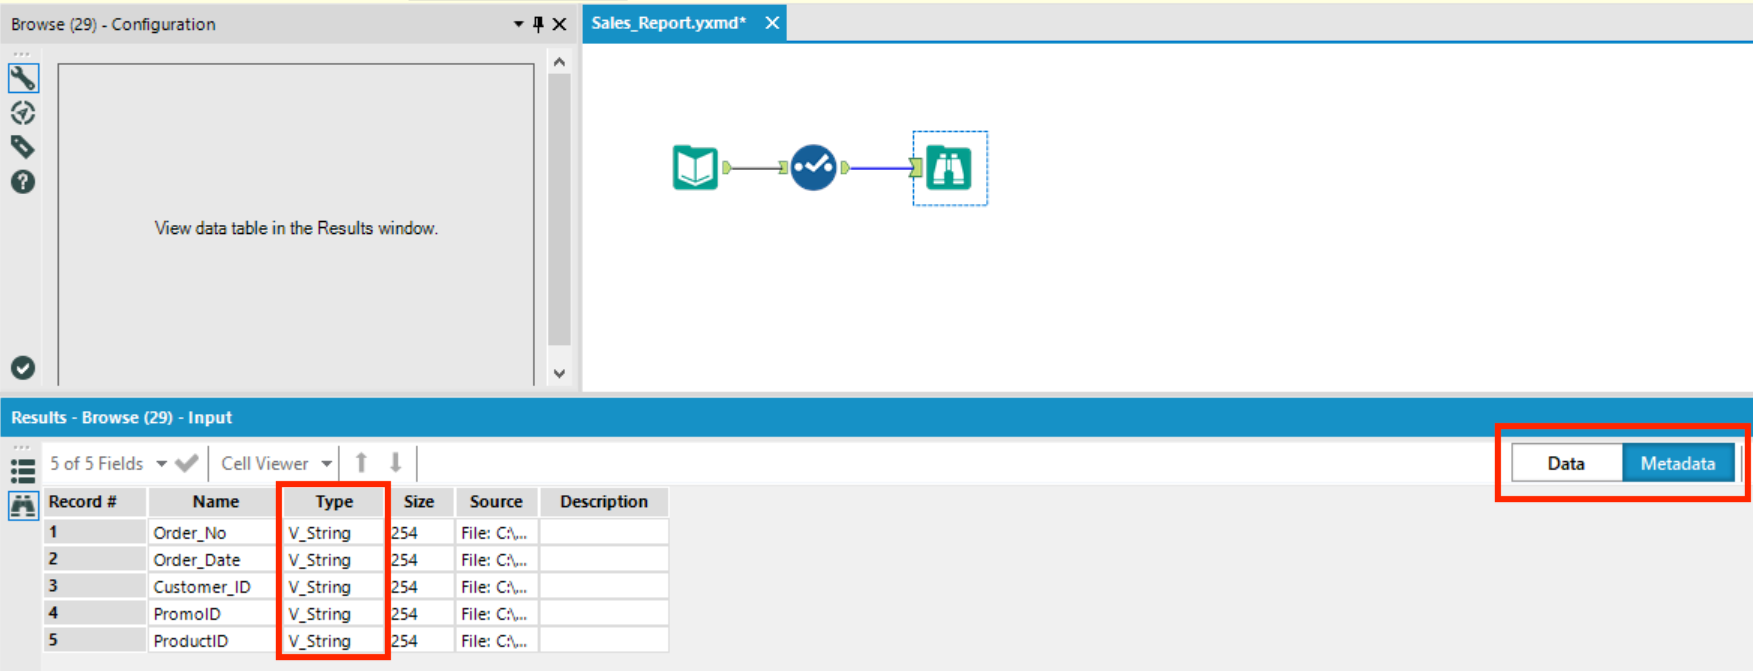
After running our workflow, we can click on the Browse tool and select Metadata in the results window. This will show us the type and size of data that has been passed to the browse tool. As you can see Alteryx, as expected, imported all our data as a V_String data type.
It’s often the case that we would like the data to be some other type for certain fields. Alteryx offers a few quick and intuitive ways to do this depending on the type and how well you know the data you've imported.
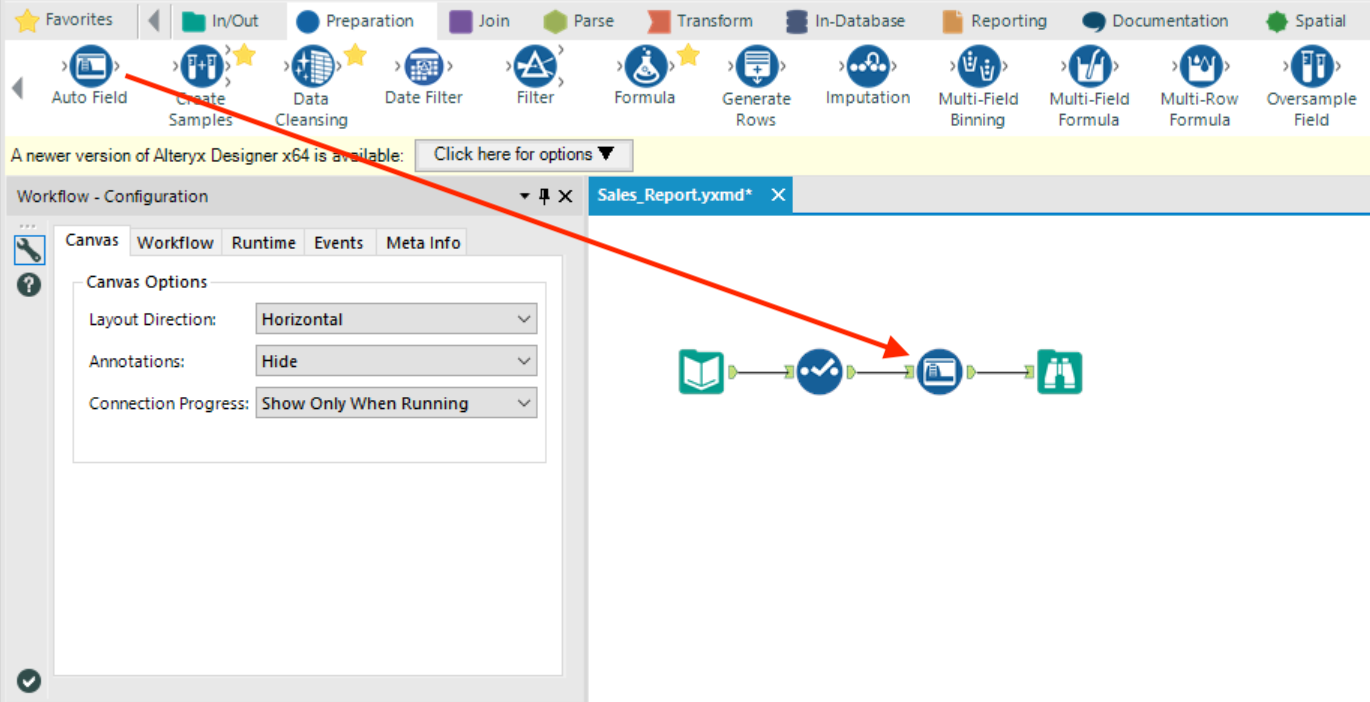
In the Preparation tab on the tool pallet there is a tool called Auto-Field (shown below).

In the configuration window we can select some or all fields for Alteryx to convert to the data type it thinks is most suitable. For example, it will detect if a field contains only strings or numbers and convert it accordingly. However, it will go one step further and makes sure to select the most appropriate data source that reduces the size of the data without losing any precision or value.
What does that mean? Suppose we have a field that contains decimal numbers, such as 1.3, 2.4, 7.1 etc that have originally being imported as a V_String data type. Auto-Field would detect that this field contains numeric values and that although converting to Int16 would reduce the size of the data, 1.3 would be converted to 1, 2.4 to 2 etc and this would be a loss of precision and Auto-Field would instead convert the field to decimal data type to preserve precision.
Step 2:
Let’s add an Auto-Field Tool in-between the Select Tool and Browse Tool in our workflow.
Select the Auto-Field Tool to display the configuration window and you will see, as default, that all fields are selected. This means Alteryx will perform the Auto-field operation on all fields. Let’s leave all fields selected and run the workflow (Ctrl-R).
Step 3:
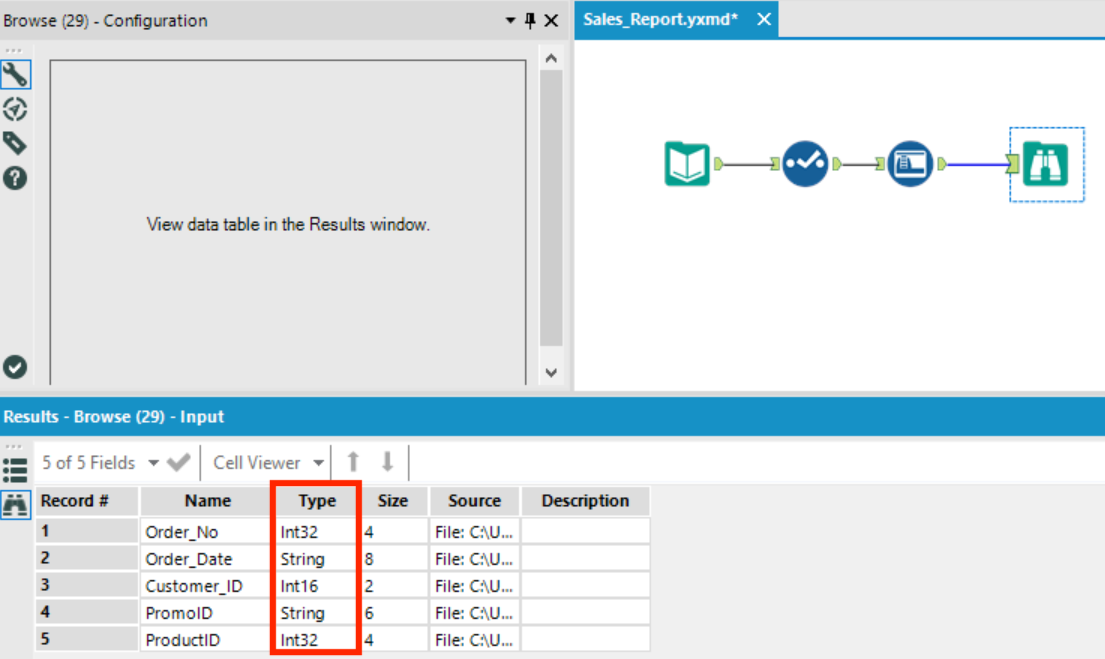
Once the workflow has run, click on the Browse Tool and let’s have a look at the metadata again.
As we can see Auto-Field has converted all the fields into what it believes is the most appropriate and efficient data type. However, it’s not perhaps the best type for how we would like to work with the data so let’s discuss how we can improve on what Alteryx has done
If we know something about the data that is not obvious to Alteryx such as what the data represents or perhaps how we would like to perform additional processing on it further along in the workflow then we can manually convert the data type using the Select Tool.
We’ve already used the Select Tool to remove fields from our data but we can also use this to quickly convert the data type of a field before it is processed downstream. We do this in the Select Tool configuration window by picking a data type from the drop down in the "Type" column of the field we would like to convert.
Step 4:
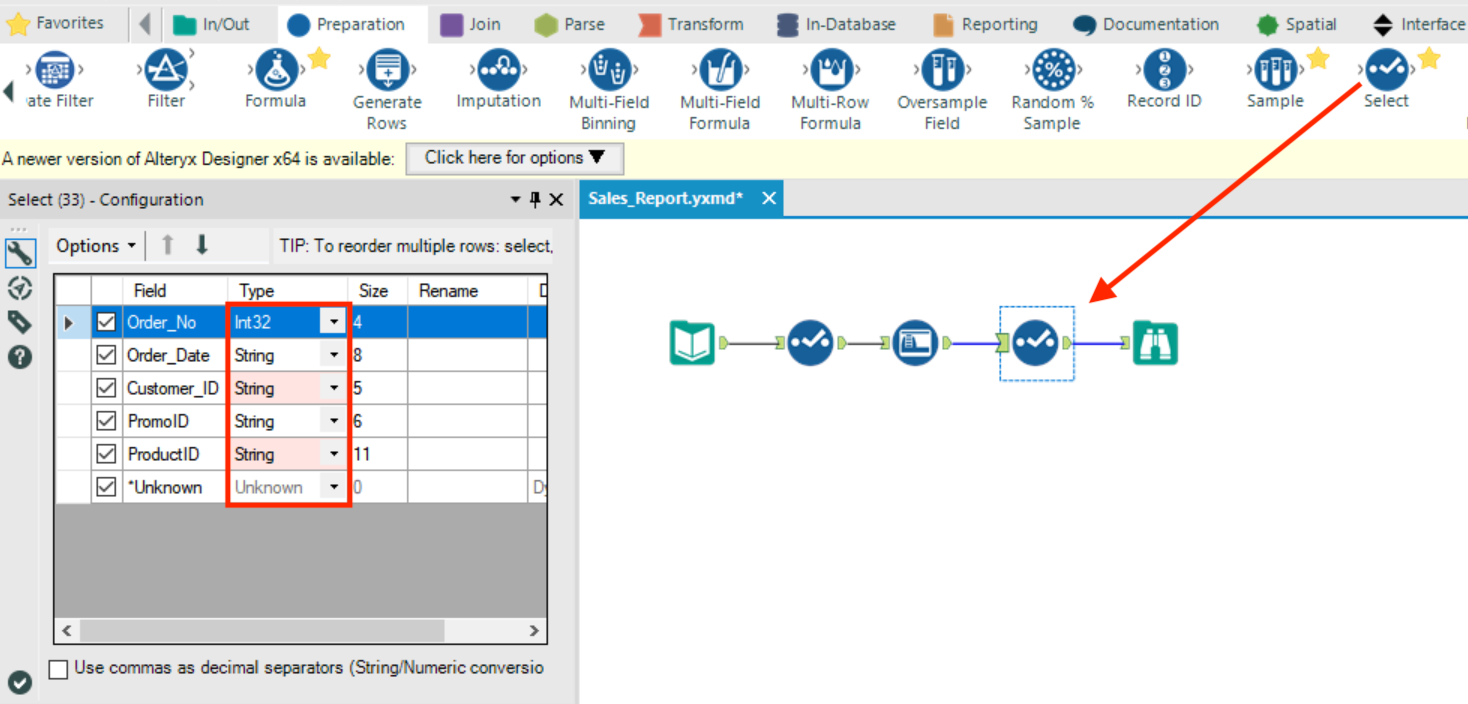
After the Auto-Field Tool worked on our data we saw that “Order_No”, “Customer_ID” and “ProductID” were converted to different types of Int (integer) which is a numeric data type. This makes sense as all these fields contain numeric values, however what Alteryx didn’t know is that these are more like numeric identifiers of the orders, customers and products of our ecommerce business and not continuous numeric values. As such, further along in the workflow we might want to do additional processing such as grouping by or concatenating these identifiers so we would prefer to have these as strings.
So let’s add a Select Tool between the Auto-Field Tool and the Browse Tool and convert the “Order_No”, “Customer_ID” and “ProductID” fields to data type “V_String” using the drop downs in the configuration window.
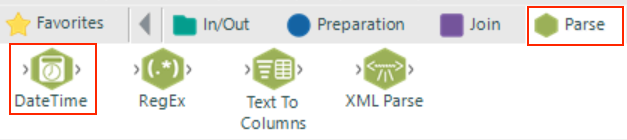
The data type that is often most troublesome when importing from sources like text files are date and time fields. Dates are often imported as strings as the date part seperators cause Alteryx to see the values as non-numeric. Alteryx provides us with a DateTime parse tool located in the Parse tab of the the tool pallet to correct this.
In the results window we can see that we have a field “Order_Date” with record 1 having date 22/11/17.
This is clearly a date to our eyes but if we click on metadata we can see that Alteryx has read this as a string. Let’s change that.
Step 5:
Go to the Parse tab on the tool pallet and locate the DateTime Tool. Click and drag the tool inbetween the Auto-field Tool and the 2nd Select Tool in the main workspace.
Step 6:
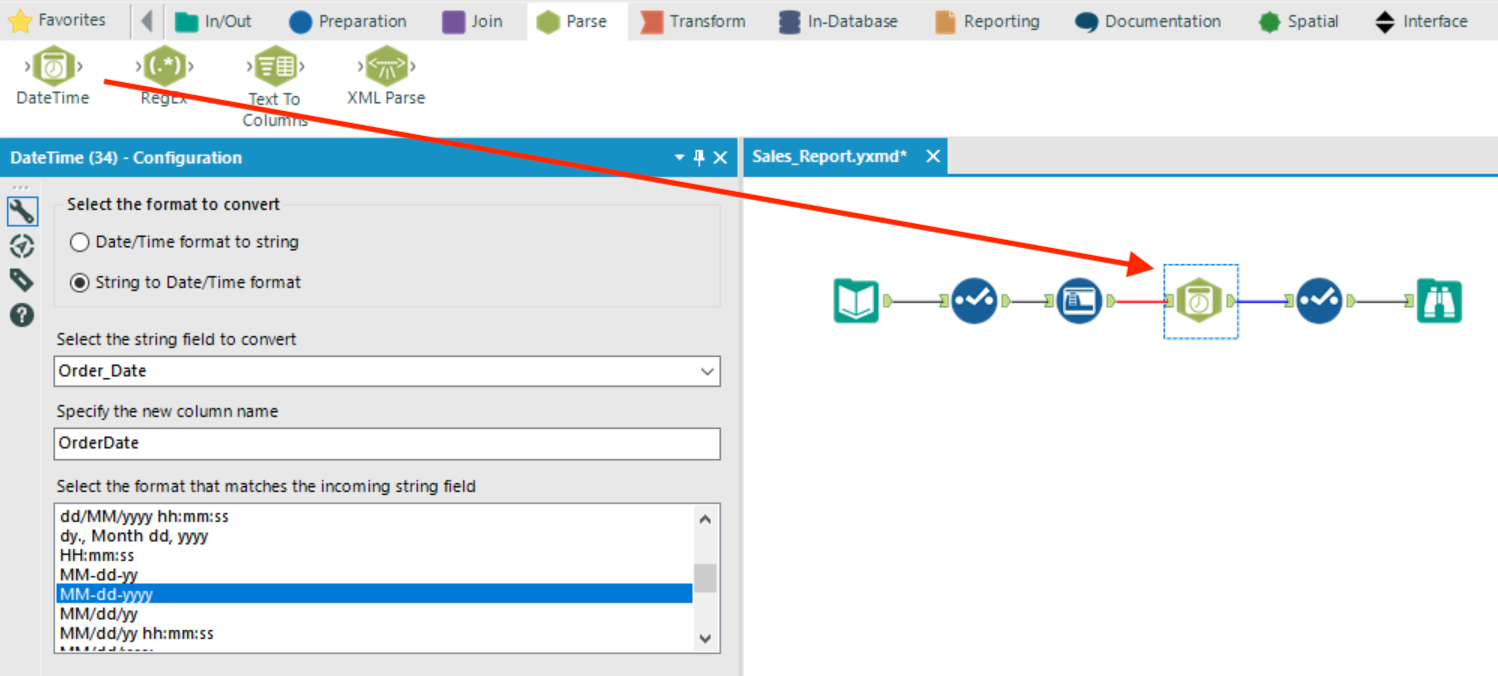
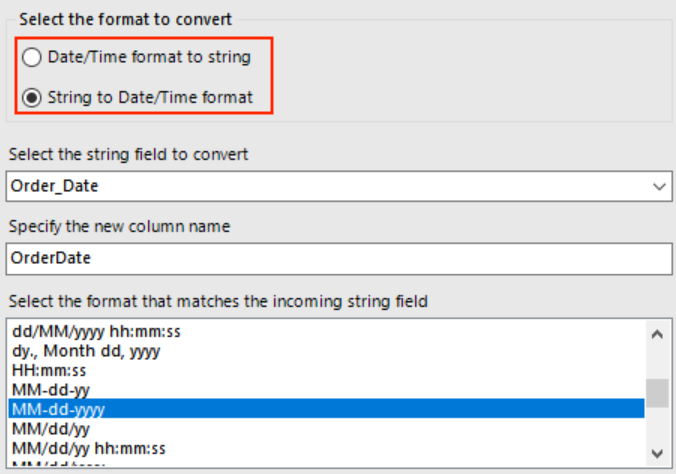
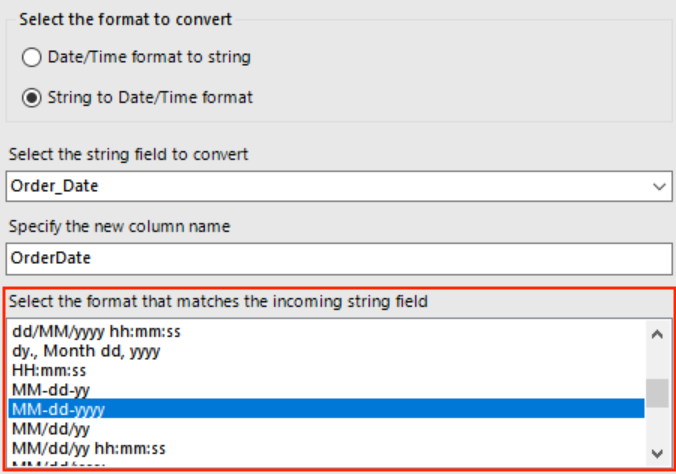
Select the DateTime Tool to display the configuration window. Here we tell Alteryx whether we want to convert a string to date or date to string. In our case we would like to convert the “Order_Date” string field to a date.
Step 7:
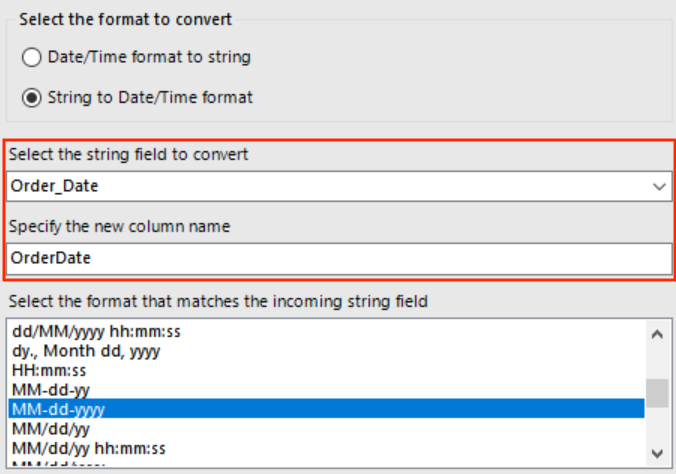
The DateTime Tool will create an additional converted date field and leave the original string field in it’s current state. The new field now requires a different name and we will call it “OrderDate”
Step 8:
Finally we need to select the format of the string that we want to convert to a date. As we can see in the data, “Order_Date” is in the format “dd/mm/yy” (i.e. 22/11/17 as seen in record 1)
Step 9:
Now run the workflow and click the Browse Tool. We can see that Alteryx has created the field “OrderDate” and if we select metadata we see that the data type of this field is “Date”.

Step 10:
There’s just one last thing to take care of. We no longer need the “Order_Date” string field so let's remove this using the Select Tool already in the workflow.
